

How To Create A Launcher Android

Repository
https://github.com/enyason/AndroidLauncherApplication
What Will I Learn?
- How to create a custom launcher from scratch
- Enable launcher Mode for our Application
- Implement Home Screen
- Implement App drawer fragment to show all applicationss
Resources
- KISS Launcher source - https://github.com/alexander255/kiss-launcher
Difficulty
- Intermediate
Tutorial Duration - 35 - 40Mins
Tutorial Content
Today I begin a new tutorial series on how to create a custom android launcher from scratch using android studio.
Launcher is the name given to the part of the Android user interface that lets users customize the home screen (e.g. the phone's desktop), launch mobile apps, make phone calls, and perform other tasks on Android devices (devices that use the Android mobile operating system). source. With this in mind , we will move right away into building a launcher application with the behaviours stated above.
In today's tutorial, we will implement the following features
- Enable launcher Mode for our Application
- Implement Home Screen with a Home Button
- Implement App drawer fragment to show all applications
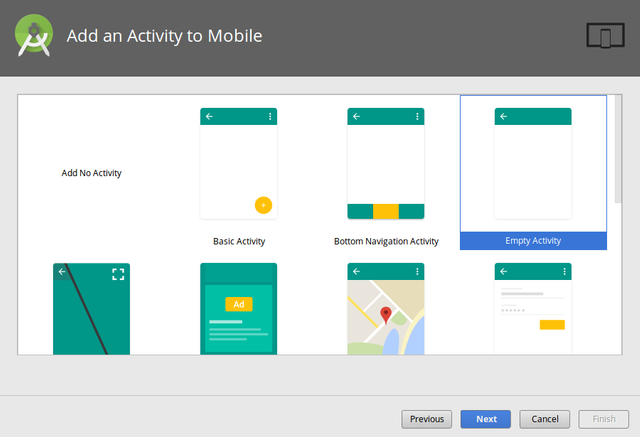
STEP 1 : Create a New Project
Create a new project and select empty activity to get started
STEP 2 : Enable Launcher Mode
To make our app act and behave like an android launcher, we will add some attributes to the main activity in our manifest file.
          <activity                                      android:name=".MainActivity"                          android:launchMode="singleTask"                          android:theme="@style/AppTheme"                          android:clearTaskOnLaunch="true"                          android:stateNotNeeded="true"            >
            <intent-filter>         <action android:name="android.intent.action.MAIN"            />
            <category android:name="android.intent.category.LAUNCHER"            />
            <category android:name="android.intent.category.HOME"            />
            <category android:name="android.intent.category.DEFAULT"            />
            </intent-filter>
            </activity>
code explanation
- The categories
android.intent.category.HOMEandandroid.intent.category.DEFAULTwill cause our application to behave like a launcher. So whenever we click on the home button, it is listed out as one of the launchers available . - The launch mode is set to single task to make sure that only one instance of this Activity is held by the system at any time
With the above steps implemented, our app should behave like shown in the image below

Implement Home Screen And Apps Drawer Screen With Fragment
To implement the Home and apps drawer screen, we will create two fragments which will be contained in our MainActivity.
STEP 3 : Create A fragment Container in MainActivity Layout
                      <?            xml version="1.0" encoding="utf-8"            ?>
            <RelativeLayout
               xmlns:android="http://schemas.android.com/apk/res/android"
   xmlns:app="http://schemas.android.com/apk/res-auto"
   xmlns:tools="http://schemas.android.com/tools"
   android:layout_width="match_parent"
               android:layout_height="match_parent"                          tools:context="com.nexdev.enyason.androidlauncherapplication.MainActivity">    <FrameLayout
                          android:layout_width="match_parent"                          android:id="@+id/container"                          android:layout_height="match_parent"></FrameLayout>
            </RelativeLayout>
code explanation
The FrameLayout in the code block above will serve as a container for any fragment being loaded into the MainActivity
STEP 3 : Create Fragment for Home Screen
XML Layout code
                      <?            xml version="1.0" encoding="utf-8"            ?>
            <RelativeLayout
                          xmlns:android="http://schemas.android.com/apk/res/android"
                          xmlns:app="http://schemas.android.com/apk/res-auto"
                          xmlns:tools="http://schemas.android.com/tools"
                          android:layout_width="match_parent"
                          android:layout_height="match_parent"
               tools:context="com.nexdev.enyason.androidlauncherapplication.MainActivity">
            <ImageView
                          android:id="@+id/icon_drawer"
                          android:layout_marginBottom="20dp"
                          android:layout_centerInParent="true"
                          android:layout_alignParentBottom="true"
                          android:src="@drawable/ic_apps"
                          android:layout_width="wrap_content"
                          android:layout_height="wrap_content"            />
            </RelativeLayout>
The image view displays the home button icon that provides access to the Apps Drawer Screen
Java code
                      public class            HomeScreenFragment            extends            Fragment {
public            HomeScreenFragment() {}
            @Nullable     @Overridepublic            View onCreateView(@NonNull LayoutInflater inflater, @Nullable ViewGroup container, @Nullable Bundle savedInstanceState) {
            View view = inflater.inflate(R.layout.              fragment_home_screen            ,container,false);return            view;     } }
complete source code
The Home Screen XML layout created at the beginning of STEP 3 is inflated and returned as a view in the onCreateView method of the HomeScreenFragment
STEP 4 : Create Fragment for Apps Drawer
XML Layout code
                      <?            xml version="1.0" encoding="utf-8"            ?>
            <RelativeLayout
                          xmlns:android="http://schemas.android.com/apk/res/android"
                          xmlns:app="http://schemas.android.com/apk/res-auto"
                          xmlns:tools="http://schemas.android.com/tools"
                          android:layout_width="match_parent"
                          android:layout_height="match_parent"
               tools:context="com.nexdev.enyason.androidlauncherapplication.MainActivity">
            <android.support.v7.widget.CardView
                   app:cardBackgroundColor="#FFF"
                          android:layout_width="match_parent"
                          android:layout_height="match_parent">                       <RelativeLayout
                              android:layout_width="match_parent"
                              android:layout_height="match_parent">
              <TextView
                              android:textColor="#000"
                              android:textStyle="bold"
                              android:layout_centerInParent="true"
                              android:text="Apps Drawer"
                              android:layout_width="wrap_content"
                              android:layout_height="wrap_content"              />
              </RelativeLayout>
              </android.support.v7.widget.CardView>                           </RelativeLayout>
Java code
                      public class            AppsDrawerFragment            extends            Fragment {
public            AppsDrawerFragment() {}
            @Nullable     @Override            public            View onCreateView(@NonNull LayoutInflater inflater, @Nullable ViewGroup container, @Nullable Bundle savedInstanceState) {
            View view = inflater.inflate(R.layout.              fragment_apps_drawer            ,container,false);return            view;     }
            }
STEP 5 : Attach Fragment to MainActivity
In the onCreate menu of the MainActivity, load the HomeScreenFragment
                      public class            MainActivity            extends            AppCompatActivity {
            @Override            protected void            onCreate(Bundle savedInstanceState) {super.onCreate(savedInstanceState);         setContentView(R.layout.              activity_main            );         loadFragment(new            HomeScreenFragment());
            }
private boolean            loadFragment(Fragment fragment) {
                        if            (fragment !=            null) {
            getSupportFragmentManager()                     .beginTransaction()                     .replace(R.id.              container            , fragment)                     .commit();return true;
            }
return false;
            }
            }
code explanation
- The loadFragment method takes an instance of the HomeScreenFragment and attach it to the MainActivity, with it's FrameLayout serving as a containing view for the fragment's layout.
With Steps 3,4 & 5 done, our app should look like this :
Implement show all applications Feature in The Drawer Screen
STEP 6 : Create A Java Class with Application Info Attributes
                      public class            AppInfo  {
            CharSequence            label;     CharSequence            packageName;     Drawable            icon; }
STEP 6 : Create a custom Adapter Class that extends the RecyclerView Adapter Class
In the constructor of our custom adapter, we are going to fetch the app list from the phone with all its attribute
                      public class            AppsDrawerAdapter            extends            RecyclerView.Adapter<AppsDrawerAdapter.ViewHolder> {
private static            Context            context;private static            List<AppInfo>            appsList;public            AppsDrawerAdapter(Context c ) {                          context            = c;            setUpApps();     }            public static void            setUpApps(){        PackageManager pManager =            context.getPackageManager();
            appsList            =            new            ArrayList<AppInfo>();         Intent i =            new            Intent(Intent.              ACTION_MAIN            ,            null);         i.addCategory(Intent.              CATEGORY_LAUNCHER            );         List<ResolveInfo> allApps = pManager.queryIntentActivities(i, 0);
for            (ResolveInfo ri : allApps) {             AppInfo app =            new            AppInfo();             app.label            = ri.loadLabel(pManager);             app.packageName            = ri.activityInfo.packageName;
            Log.i(" Log package ",app.packageName.toString());             app.icon            = ri.activityInfo.loadIcon(pManager);appsList.add(app);
            }
            }
            }
complete source code
code explanation
- The AppsDrawerAdapter constructor requires a context from the application, which will be used to get the Package Manager.
- In the setUpApps method of the AppsDrawerAdapter class, we use the queryIntentActivities method of the PackageManager class to fetch all theIntents that have a category of Intent.CATEGORY_LAUNCHER. The query returns a list of the applications that can be launched by a launcher.
- We use a For loop to Loop through the results of the query and add each item to a list named appsList.
STEP 6 : Display The List of Applications in the Apps Drawer Screen
With our List of installed apps available, we can now display it in our Apps Drawer Screen using a recyclerView. Include the following code to the AppDrawer Fragment Class
          @Override
            public void            onViewCreated(@NonNull View view, @Nullable Bundle savedInstanceState) {super.onViewCreated(view, savedInstanceState);
recyclerView            = view.findViewById(R.id.              appDrawer_recylerView            );adapter            =            new            AppsDrawerAdapter(getContext());            layoutManager            =            new            LinearLayoutManager(getContext());                          recyclerView.setLayoutManager(layoutManager);            recyclerView.setAdapter(adapter);
            }
complete source code
STEP 7 : Test The Application
Application Demo - With these steps covered, our app should look like this
How To Create A Launcher Android
Source: https://steemit.com/utopian-io/@ideba/how-to-build-a-custom-android-launcher-and-home-screen-application-part-1
Posted by: hicksbuntind.blogspot.com
0 Response to "How To Create A Launcher Android"
Post a Comment